

Welcome to part two of our RV renovations, the spray painting. Unlike the rest of the painting it did not take weeks. Luckily the Valspar spray paint we bought covered in one coat and I was able to do it all in the same day.
As you remember from the blog post Robert wrote about painting our tiny home on wheels on his first day of painting the little brother and I secured all of the hardware to cardboard and spray painted that with Rustoleum metallic paint in the brushed nickle finish.
Securing the pieces to the hardware was probably one of the best ideas I've had during these renovations because it kept everything organized and from falling over onto each other.
This also allowed me to use the screws that would be showing to secure the hinges down so that they could be painted as well & would match the hinges once we put them back. I consider this a win-win!

The first photo on this post was of the stove hood all masked and painted, check out the final result above! Taking your time taping all of the edges neatly and making sure to place newspaper or plastic over areas you don't want painted saves a lot of headache!
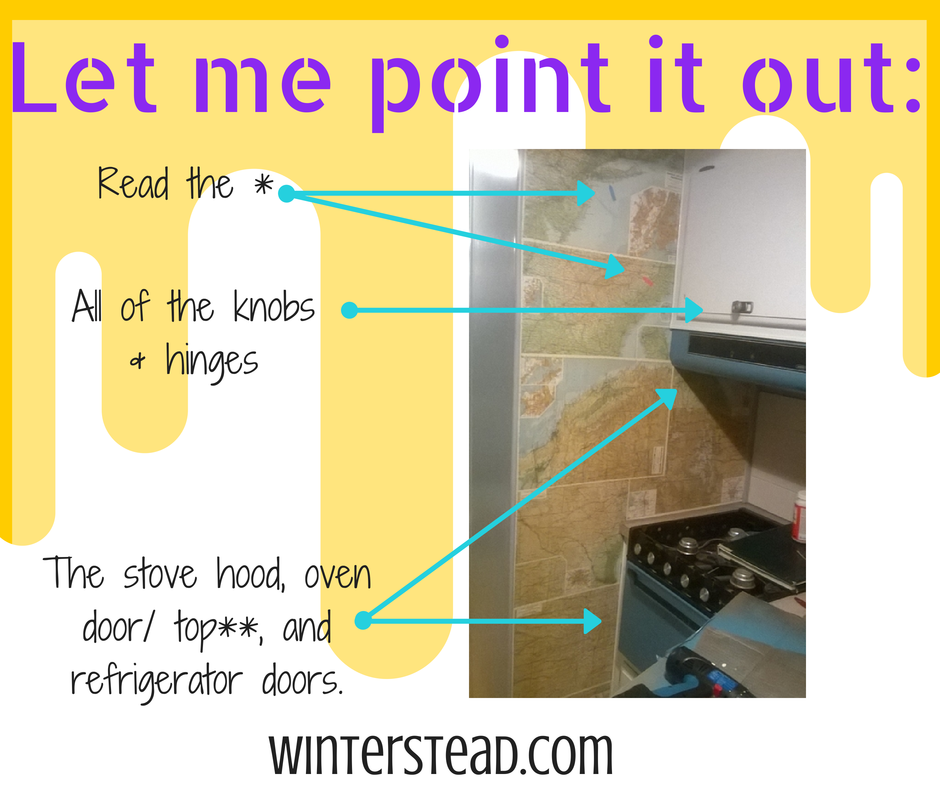 |
| *This has nothing to do with spray painting but when I used modge podge to decoupage these atlas pages to the walls I also decoupaged pink and blue sticky tabs pointing out where Robert and I are from. The pink one points to the Peidmont Triad of NC where I grew up and the blue one points to Long Island, NY where Robert grew up! By the way I used three coats of glossy modge podge to secure these maps to the wall and provide a surface that would be easy to clean. |
For the refrigerator door panels there were two tiny screws that you can take off to release one side of the (tan colored) edge. Then you can carefully pull the panels out and spray paint them. It would have been super messy & hard to tape around those doors because the panels are not glued down & there would have been drips & ugh.. let's just say I'm glad I took them out!
**The same applies for the top of the stove and the oven door. There were four screws (two on the top and two on the bottom) of the door. Once those screws were removed the front of the door (with the handle still attached) pulls away from the back (the side that is inside the oven) and reveals a layer of insulation. The insulation was not glued into place or anything so I took that out and put it to the side.
There were also two screws on the inside that allowed me to take the handle off. This may sound complicated but I can assure you that taking these extra steps kept me from doing a lot of messy masking and ensured the final result would be smooth and drip-less!
The stove top is made to detach so that you can easily adjust the burners. So that was a no-brainer.
I took all of the panels, doors, and pieces outside, spray painted them, let them dry for 48 hours and put them back. Giving them adequate time to dry ensures that you won't scratch them when trying to put them back.
That pretty much sums up the spray painting part of our RV makeover! Stay tuned for part three where I go over how I made Roman shades out of old mini blinds & completely redid the upholstery!
If you want to make sure you are notified, since Facebook can be a little sketchy about delivering posts to your news feed, sign up for e-mail alerts! This will send our posts directly to your inbox (no spam guaranteed) and you will never have to miss another post!

Thanks for sharing this awesome post. I am also using painting spray, really it's working well.
ReplyDelete